BLEss UI
BLEss UI is a set of commonly used Android UI Components.
Setup
Dependencies
Apply the setup from bless-core, then add this module:
// BLEss core features
implementation "com.troido.bless:bless-ui:$bless_version"
Basic information
In the bless-ui module we have 3 different levels of activity abstraction and 2 abstract services. The most abstract activity is ScanActivity. It has basic methods like startScan() and stopScan() as well as abstract method-callbacks (onIsScanningChanged(),onNewDevicesList(),handleError()).
Then comes ListScanActivity. This activity requires a ListAdapter, it has embedded listView which displays scanned devices through this adapter. Selected ble device will be returned in onActivityResult() method of a caller activity or in the onDeviceSelected() method of the instance if it overrides it.
Finally, BlessScanActivity is a ready to go activity that provides its own ListAdapter and returns a selected ble device to the onActivityResult() method of a caller activity.
Below you can see UML class diagram that represents the dependencies between these three classes.

Additional info for the picture:
italic text - abstract classes, fields, methods
normal text - normal classes, fields, methods
underline text - static fields, methods
# - protected fields and methods
Other part of the bless-ui is the abstract BleConnectService, It has basic methods to connect, disconnect, requestMtu, etc. and abstract callback methods that will be invoked in an instance of this service. Uml class diagram is presented below.

Additional info for the picture:
italic text - abstract classes, fields, methods
normal text - normal classes, fields, methods
underline text - static fields, methods
# - protected fields and methods
Another abstract service is BleScanService. We can start and stop scan by running/stopping the service that derives from it. Uml class diagram is presented below.

Additional info for the picture:</br> italic text - abstract classes, fields, methods</br> normal text - normal classes, fields, methods</br> underline text - static fields, methods </br> # - protected fields and methods
Usage
BlessScanActivity
BlessScanActivity is the simplest way to let the user select a nearby ble device. it uses ActivityResultContracts.
requestBluetoothScanning.launch(BlessScanActivity.getIntent(this))
Retrieve the result inside your contract in your Activity or Fragment:
private val requestBluetoothScanning =
    registerForActivityResult(ActivityResultContracts.StartActivityForResult()) {
        when (it.resultCode) {
            RESULT_ABORT -> showToast("User Aborted Scanning")
            RESULT_SUCCESS -> {
                val macAddress = BlessScanActivity.getAddressFromResult(it.data)
                showToast("Retrieved Mac: $macAddress")
            }
            RESULT_SCANNING_ERROR -> showToast("Error In Scanning")
        }
    }
The result is defined in the base class ListScanActivity:
RESULT_SCANNING_ERRORis called on scan errors. That can happen when the limit of start-scan requests per time was reached (usually 5 times per 30 seconds since Android 7).- When Bluetooth is disabled a dialog is shown.
RESULT_ABORTis returned when the user denies enabling bluetooth. RESULT_ABORTis returned when the back- or upbutton was pressed or location permission was permanently denied, too.RESULT_SUCCESSis returned when the the user chooses a device. The data has the device address.
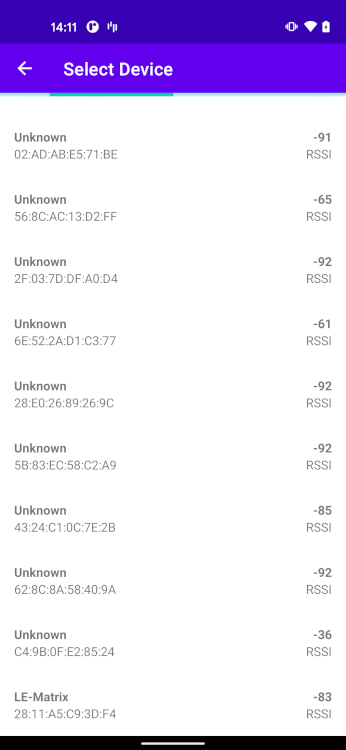
By default BlessScanActivity uses an own theme. You can use your theme by adding the parameter to startForResult. The theme should have an action bar. You can customize scanning by adding ScanSettings or a ScanFilter
The result looks like the image below
ListScanActivity
You can create an own implementation of ListScanActivity to customize it. It has a ProgressBar on top and a RecyclerView below. The ProgressBar shows if the phone is scanning. When the user selects a device, onDeviceSelected(address: String, name: String?) should be called. By implementing a ListAdapter you can change the way the scanned devices are visualized.
1) Create a view for the listItems.
<?xml version="1.0" encoding="utf-8"?>
<androidx.constraintlayout.widget.ConstraintLayout xmlns:android="http://schemas.android.com/apk/res/android"
    xmlns:app="http://schemas.android.com/apk/res-auto"
    xmlns:tools="http://schemas.android.com/tools"
    android:layout_width="match_parent"
    android:layout_height="wrap_content"
    android:background="?attr/selectableItemBackground"
    android:clickable="true"
    android:focusable="true">

    <ImageView
        android:id="@+id/image"
        android:layout_width="wrap_content"
        android:layout_height="wrap_content"
        android:padding="24dp"
        android:src="@drawable/ic_baseline_bluetooth_24"
        app:layout_constraintBottom_toBottomOf="parent"
        app:layout_constraintStart_toStartOf="parent"
        app:layout_constraintTop_toTopOf="parent" />

    <TextView
        android:id="@+id/name"
        android:layout_width="0dp"
        android:layout_height="wrap_content"
        app:layout_constraintBottom_toBottomOf="parent"
        app:layout_constraintEnd_toEndOf="parent"
        app:layout_constraintStart_toEndOf="@id/image"
        app:layout_constraintTop_toTopOf="parent"
        tools:text="Hello" />

</androidx.constraintlayout.widget.ConstraintLayout>
2) Create a ViewHolder that references the used views.
class CustomViewHolder(itemView: View) : RecyclerView.ViewHolder(itemView) {
    val nameView: TextView = itemView.name
}
3) Create a ListAdapter that puts the ScanResults into the RecyclerView.
class CustomAdapter(private val deviceSelectedCallback: DeviceSelectedCallback) :
    ListAdapter<ScanResult, CustomViewHolder>(CustomItemCallback()) {

    override fun onCreateViewHolder(parent: ViewGroup, viewType: Int): CustomViewHolder {
        val view =
            LayoutInflater.from(parent.context).inflate(R.layout.custom_view_holder, parent, false)
        return CustomViewHolder(view)
    }

    override fun onBindViewHolder(holder: CustomViewHolder, position: Int) {
        val scanResult = getItem(position)
        holder.nameView.text = scanResult.device.name
        // This is the ConstraintLayout. We have set it to clickable and focusable.
        // The background attribute will give us the clicking animation.
        holder.itemView.setOnClickListener { deviceSelectedCallback.onDeviceSelected(scanResult.device.address) }
    }

    class CustomItemCallback : DiffUtil.ItemCallback<ScanResult>() {
        override fun areItemsTheSame(oldItem: ScanResult, newItem: ScanResult): Boolean {
            // The Bluetooth Device Address is unique so we can use it as an ID
            return oldItem.device.address == newItem.device.address
        }

        override fun areContentsTheSame(oldItem: ScanResult, newItem: ScanResult): Boolean {
            // Since the ListItem only shows the name we are only interested in updates on the name.
            return oldItem.device.name == newItem.device.name
        }
    }
}
4) Create a custom activity that extends ListScanActivity.
class CustomScanningActivity : ListScanActivity<ScanResult>() {
    override val adapter = CustomAdapter(this::onDeviceSelected)

    // As an example, we only show devices, that advertise a name.
    override fun getListForAdapter(deviceList: List<ScanResult>) =
        deviceList.filter { it.device.name != null }

    override val scanFilter = ScanFilter.empty()
    override val scanSettings = ScanSettings.default()
}
The result looks like the image below
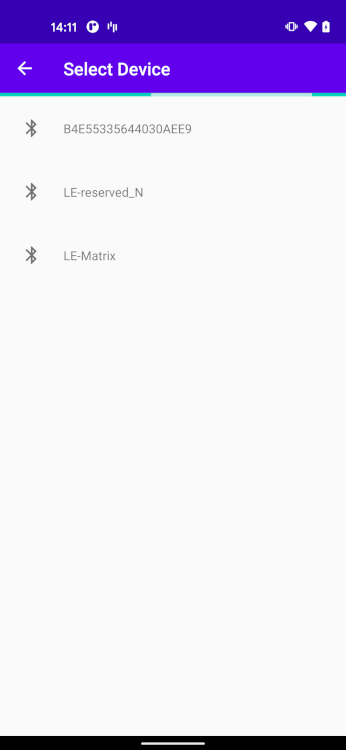
With getListForAdapter(deviceList: List<T>) you can change the list before it gets passed to the adapter. If the whole List should just be forwarded you can return deviceList. But you can also put your own logic to filter the list by your own needs or even merge it with your own data by mapping it. The generic type will help you pass your own objects to the adapter.
ScanActivity
If you need even more flexibility you can extend ScanActivity.startScan() will start scanning if all conditions are met. It will make sure that the bluetooth adapter is enabled and the permissions are granted. If the user does finally deny that handleError(true) will be called. If there is a technical issue handleError(false) will be called. The scanning state can be observed with onIsScanningChanged(boolean). The list of scanned devices is provided in onNewDevicesList(List<ScanResult>). The cache of scanned devices can be cleared with clearScanResults(). Method stopScan() will stop the scanning process.
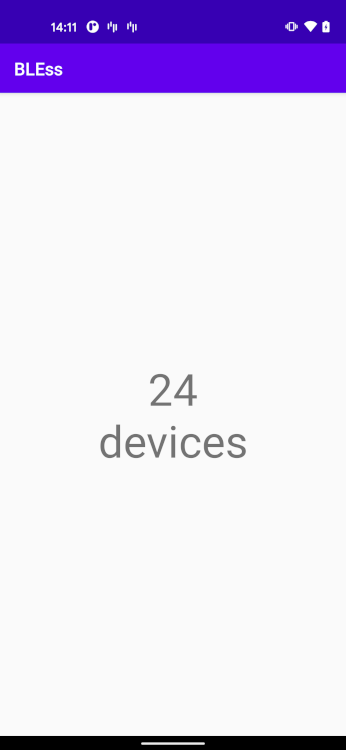
Here is an activity that just counts the scanned devices.
<?xml version="1.0" encoding="utf-8"?>
<TextView xmlns:android="http://schemas.android.com/apk/res/android"
    xmlns:tools="http://schemas.android.com/tools"
    android:id="@+id/count"
    android:layout_width="match_parent"
    android:layout_height="match_parent"
    android:gravity="center"
    android:textSize="50sp"
    tools:text="0\ndevices" />
class CounterActivity : ScanActivity() {
    override val scanFilter = ScanFilter.empty()
    override val scanSettings = ScanSettings.default()

    override fun onIsScanningChanged(isScanning: Boolean) {
        Toast
            .makeText(this, "Scanning changed to: $isScanning", Toast.LENGTH_SHORT)
            .show()
    }

    override fun onNewDevicesList(newDevicesList: List<ScanResult>) {
        count.text = "${newDevicesList.size}\ndevices"
    }

    override fun handleError(isUserDecision: Boolean) {
        Toast
            .makeText(this, "Scan Error. By User: $isUserDecision", Toast.LENGTH_LONG)
            .show()
    }

    override fun onCreate(savedInstanceState: Bundle?) {
        super.onCreate(savedInstanceState)
        setContentView(R.layout.activity_device_counter)
    }

    override fun onResume() {
        super.onResume()
        startScan()
    }

    override fun onPause() {
        super.onPause()
        stopScan()
    }
}
The result looks like the image below
BleConnectService
Bless-ui module provides the abstract BleConnectService. This service starts on devices and connects to the device whose address passed in an intent with EXTRA_REMOTE_DEVICE_ADDRESS key. User can stop this service directly with a stop button on a notification. It also has plenty of methods that give an opportunity to implement desired behaviour (you can see them on the UML class diagram above)
Example of starting service static method:
class CustomBleConnectService : BleConnectService()

....

  companion object {

      fun startService(context: Context, address: String) {
          val intent = Intent(context, CustomBleConnectService::class.java)
          intent.putExtra(EXTRA_REMOTE_DEVICE_ADDRESS, address)
          if (Build.VERSION.SDK_INT >= Build.VERSION_CODES.O) {
              context.startForegroundService(intent)
          } else {
              context.startService(intent)
          }
      }
  }
BleScanService
Bless-ui module provides the abstract BleScanService. This service starts on devices and begins scanning. User can stop this service directly with a stop button on a notification. Service stops scanning whenever it is stopped.
Example of starting service static method:
class ScanService : BleScanService() {

    override val scanSettings: ScanSettings =
        ScanSettings.Builder().scanMode(ScanMode.LOW_LATENCY).build()

    override val scanFilter: ScanFilter = super.scanFilter

    override fun onScanFailed(errorCode: Int) {
        Timber.d("Scan failed, errorCode: $errorCode")
        stopSelf()
    }

    override fun onScanResult(result: ScanResult) {
        Timber.d("Scan result, result: $result")
    }
}
ScanServiceActivity.kt
....

binding.startServiceButton.setOnClickListener {
    Timber.d("Start service button clicked")
    if (android.os.Build.VERSION.SDK_INT >= android.os.Build.VERSION_CODES.O) {
        startForegroundService(Intent(this, ScanService::class.java))
    } else {
        startService(Intent(this, ScanService::class.java))
    }
}

....